Installing Star Citizen on the Bare Metal plan
Easy method: our installer
The simplest way to install Star Citizen on our cloud gaming service is our custom .deb installer, which walks you through the process with minimal input required: Download Starcitizen.zip
If you'd rather install it manually, follow the full instructions below.
Manual installation
Step 1 — Set up ZRAM. Install the ZRAM tools, which improve system performance by compressing memory:
sudo apt install zram-tools
Enable the LZ4 compression algorithm — this makes memory compression faster and more efficient:
sudo sed -i "s/^#ALGO=lz4/ALGO=lz4/" /etc/default/zramswap
Allocate 50% of your system's memory for ZRAM:
sudo sed -i "s/^#PERCENT=50/PERCENT=50/" /etc/default/zramswap
Remove any existing vm.page-cluster settings from the system configuration file:
sudo sed -i "/vm.page-cluster/d" /etc/sysctl.conf
Add a new setting that optimizes how memory pages are grouped, which can improve performance:
sudo sed -i -e '$a'"vm.page-cluster = 0" /etc/sysctl.conf
You will need to restart the operating system for the ZRAM settings to take effect. Open the terminal and run:
sudo reboot
sudo swapoff -a in the terminal every time you run the game.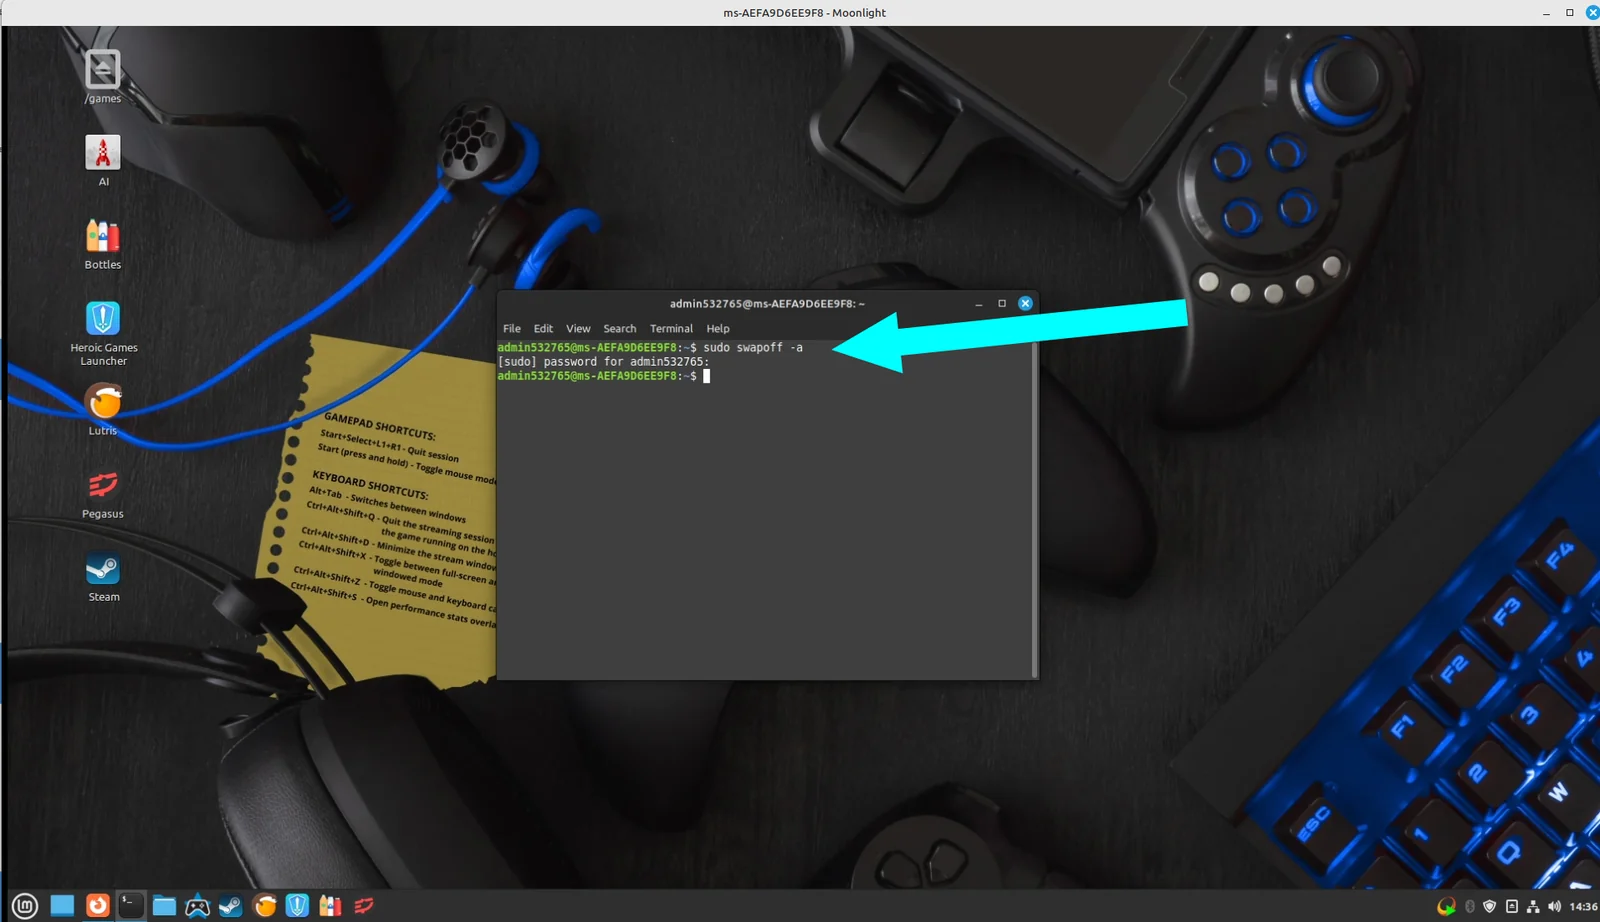
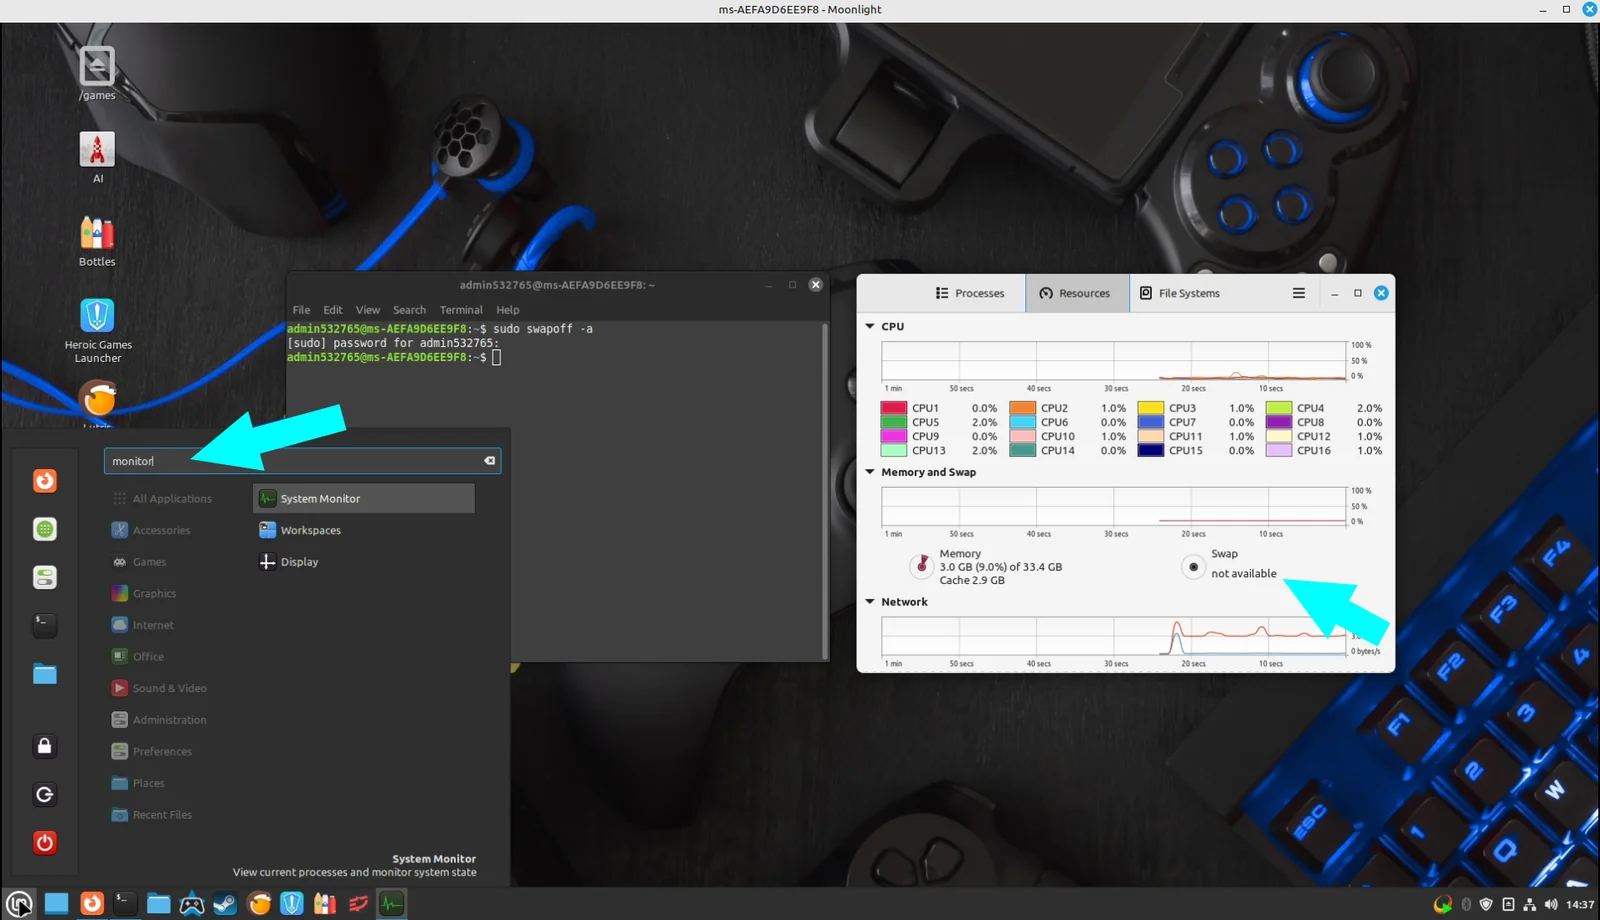
Step 2 — Confirm swap is off. Bring up the Linux Mint System Monitor and confirm that swap has been turned off.
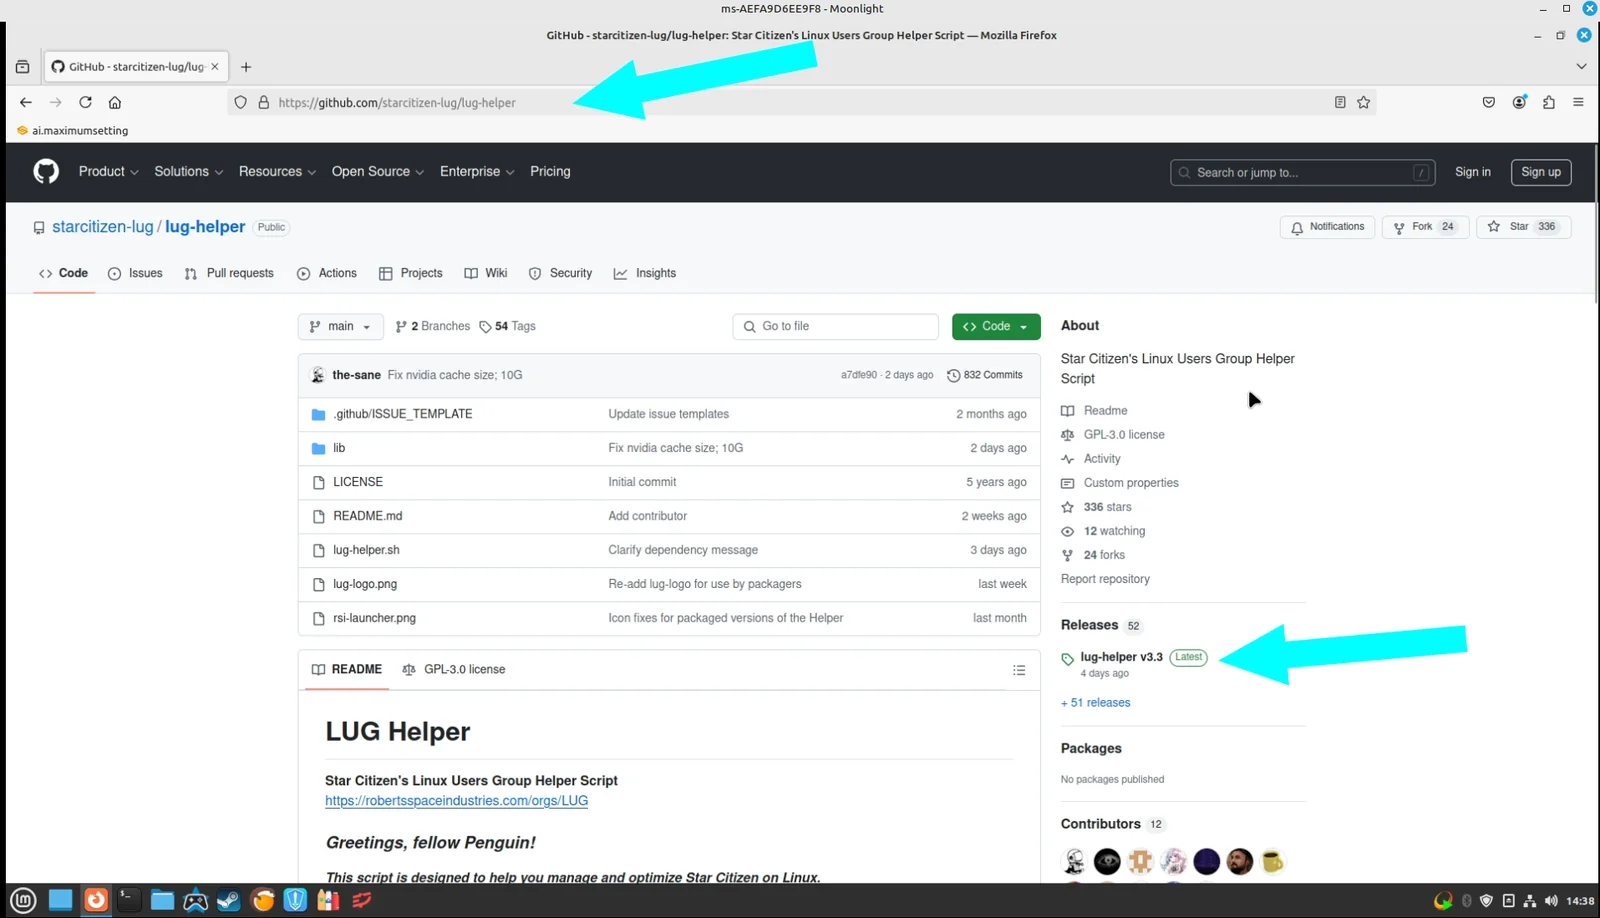
Step 3 — Download the Lug Helper. Visit github.com/starcitizen-lug/lug-helper and click on the latest version on the right-hand side of the page.
Step 4 — Get the source. Download the source.zip version of the installer helper script.
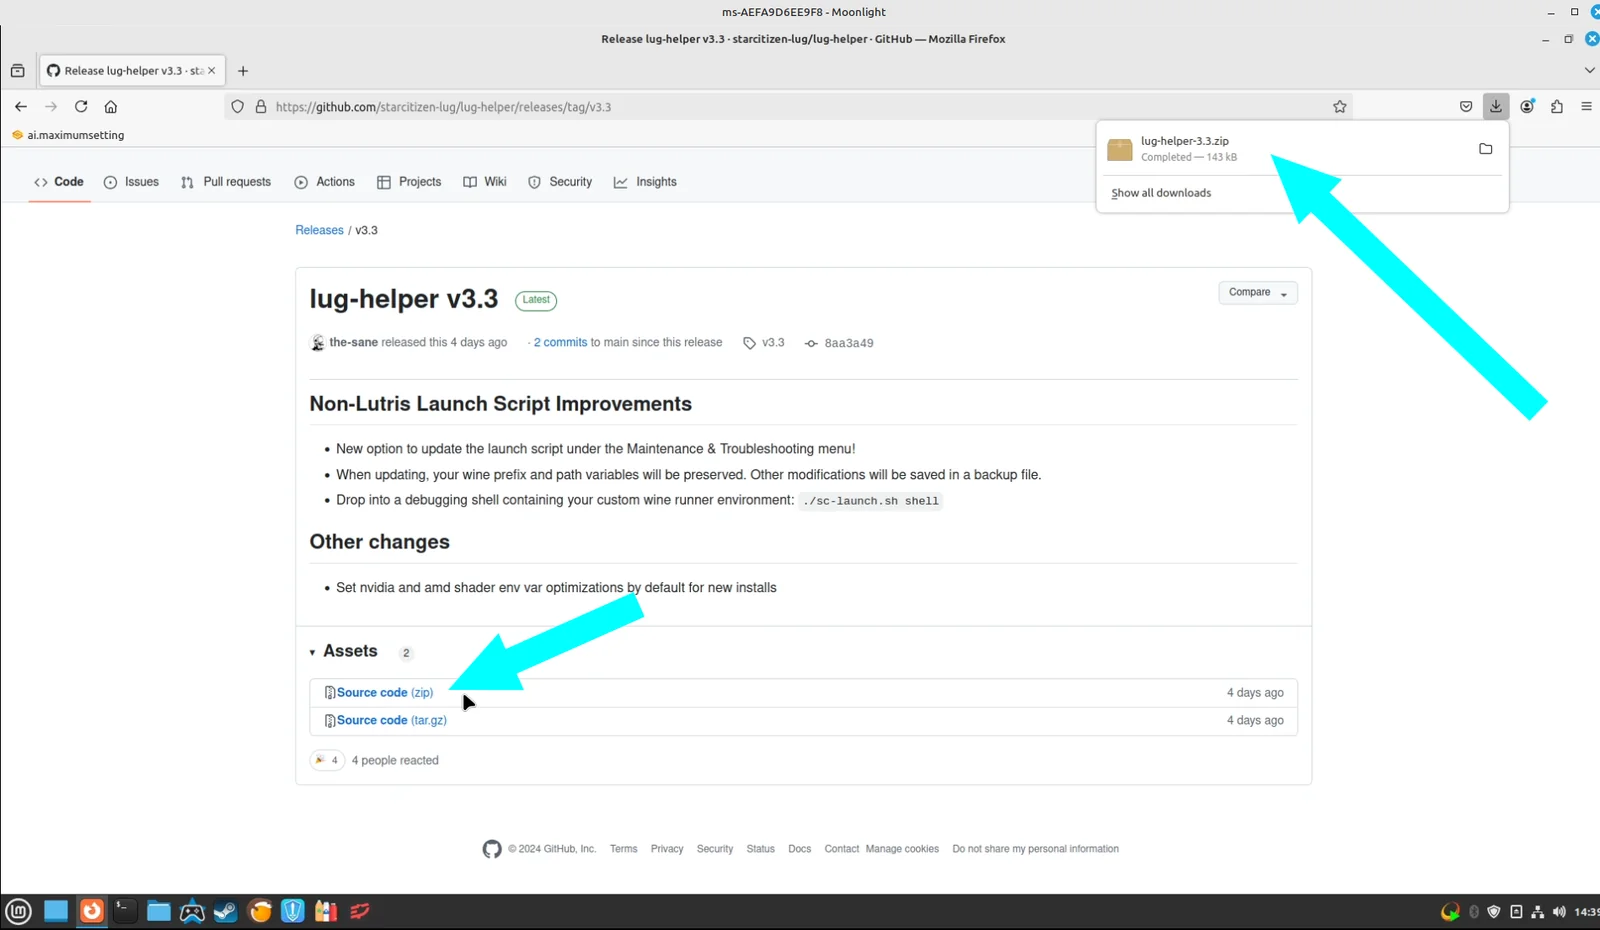
Step 5 — Show in folder. Head over to the download folder: right-click the download, then click "Show in Folder".
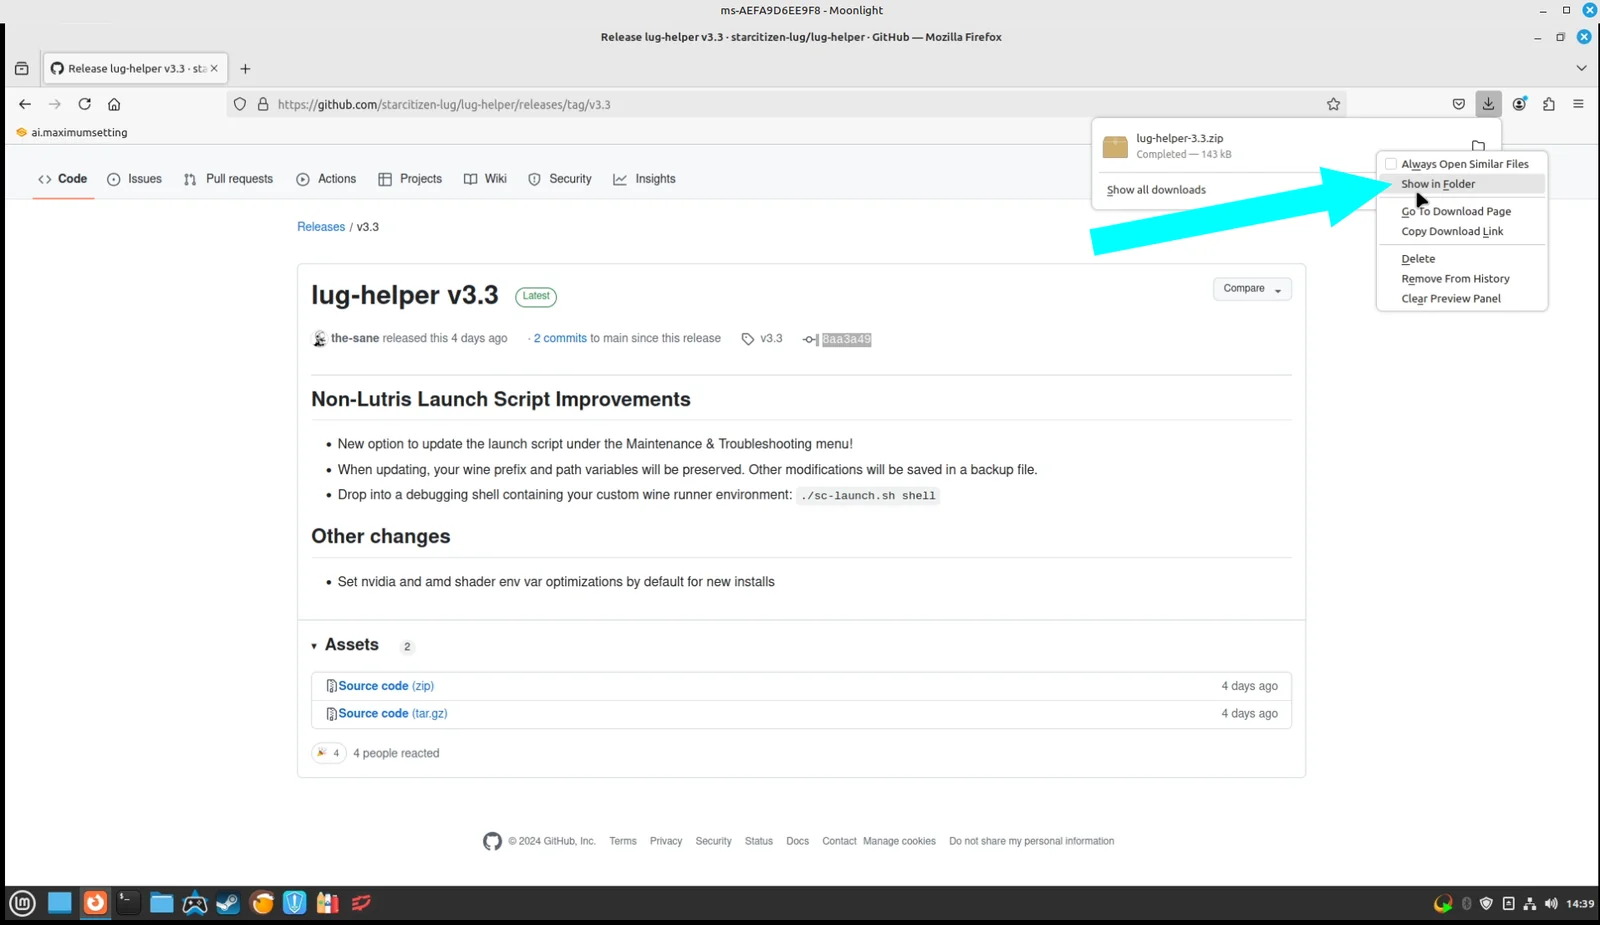
Step 6 — Extract. Right-click on the source.zip file and extract it.
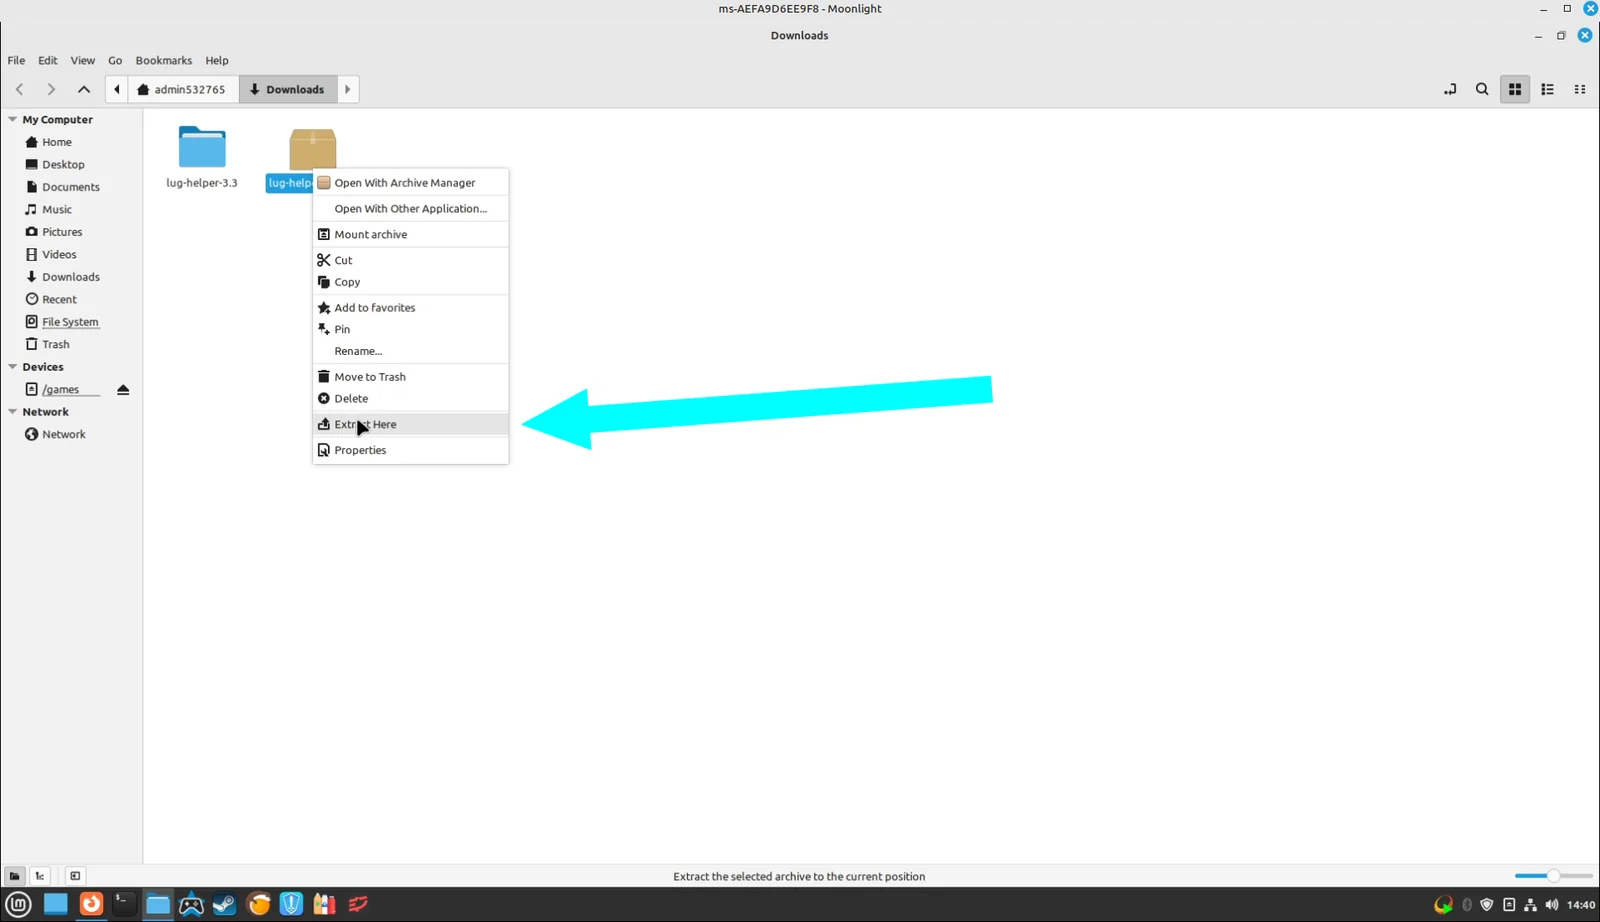
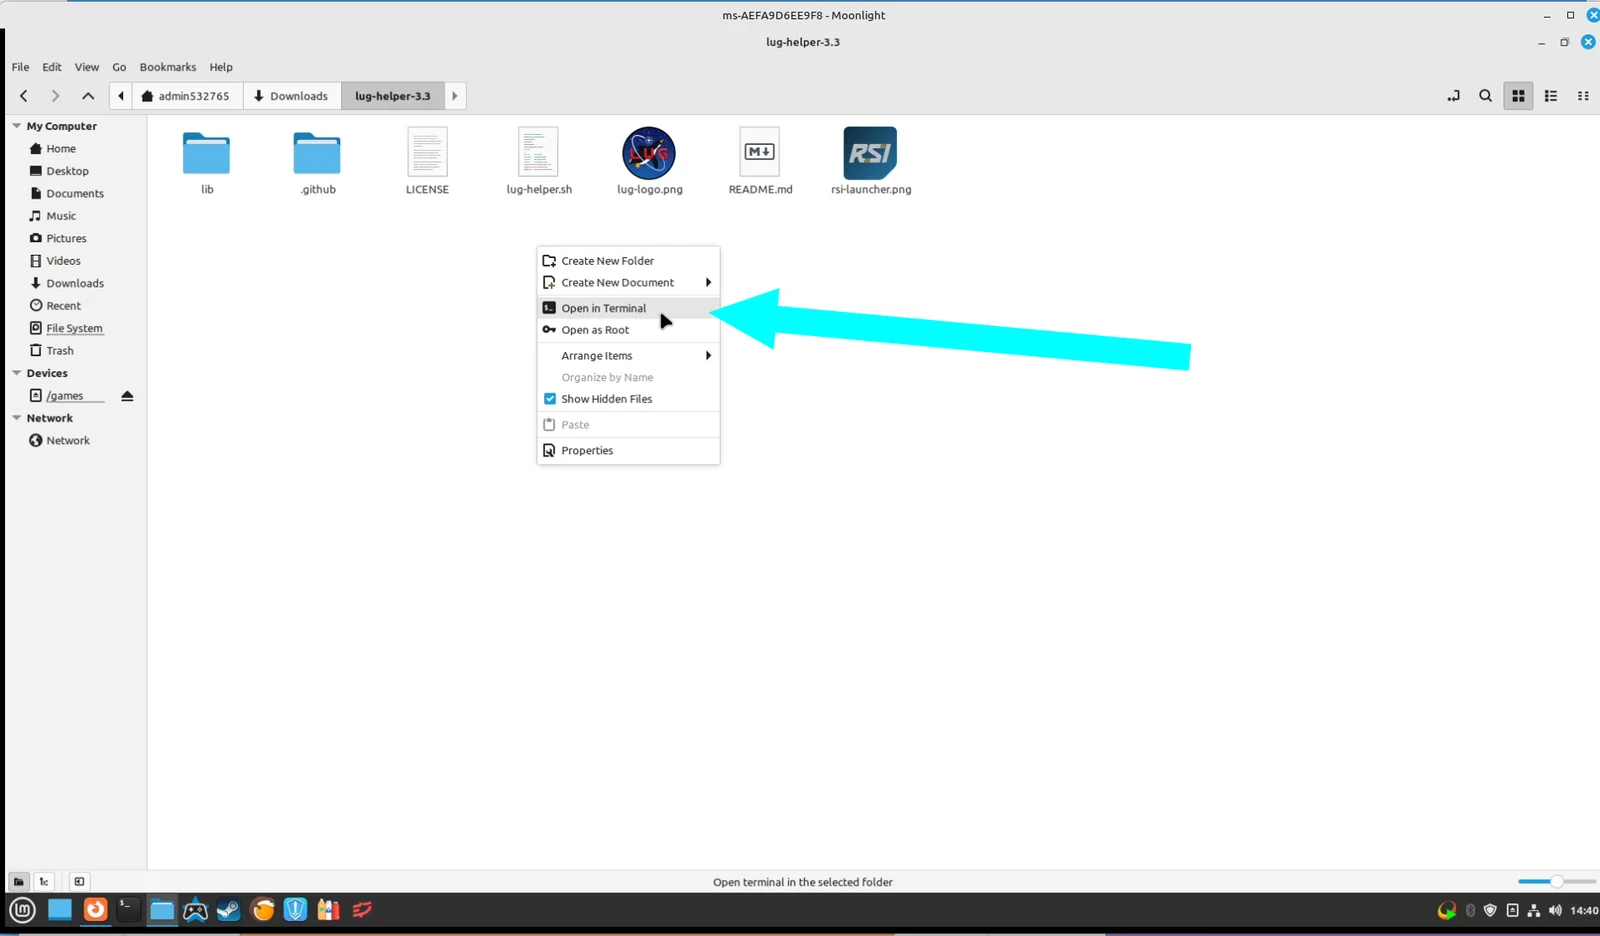
Step 7 — Open a terminal. Double-click on the extracted folder, then right-click on an empty area and select "Open in Terminal".
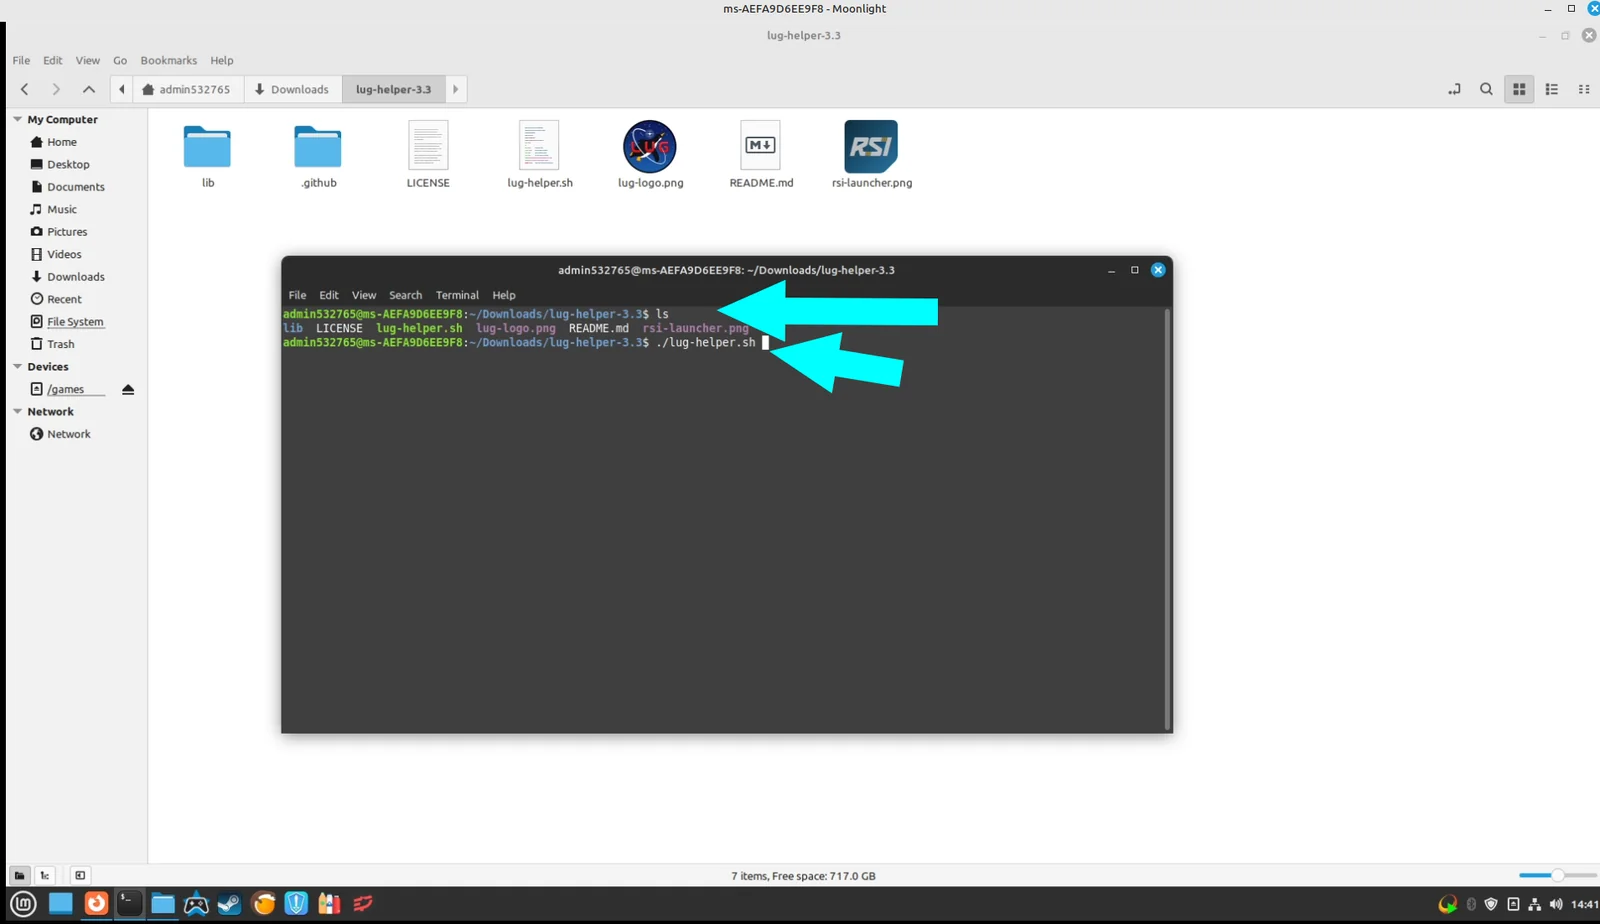
Step 8 — Run the helper. Type ls and press Enter to look for the lug-helper.sh file. To run it, type ./lug-helper.sh and press Enter. The script will prompt you for the Linux admin password, which can be found in the welcome letter.
Step 9 — Begin install. This launches the Star Citizen installation. Click "Yes" on this screen.
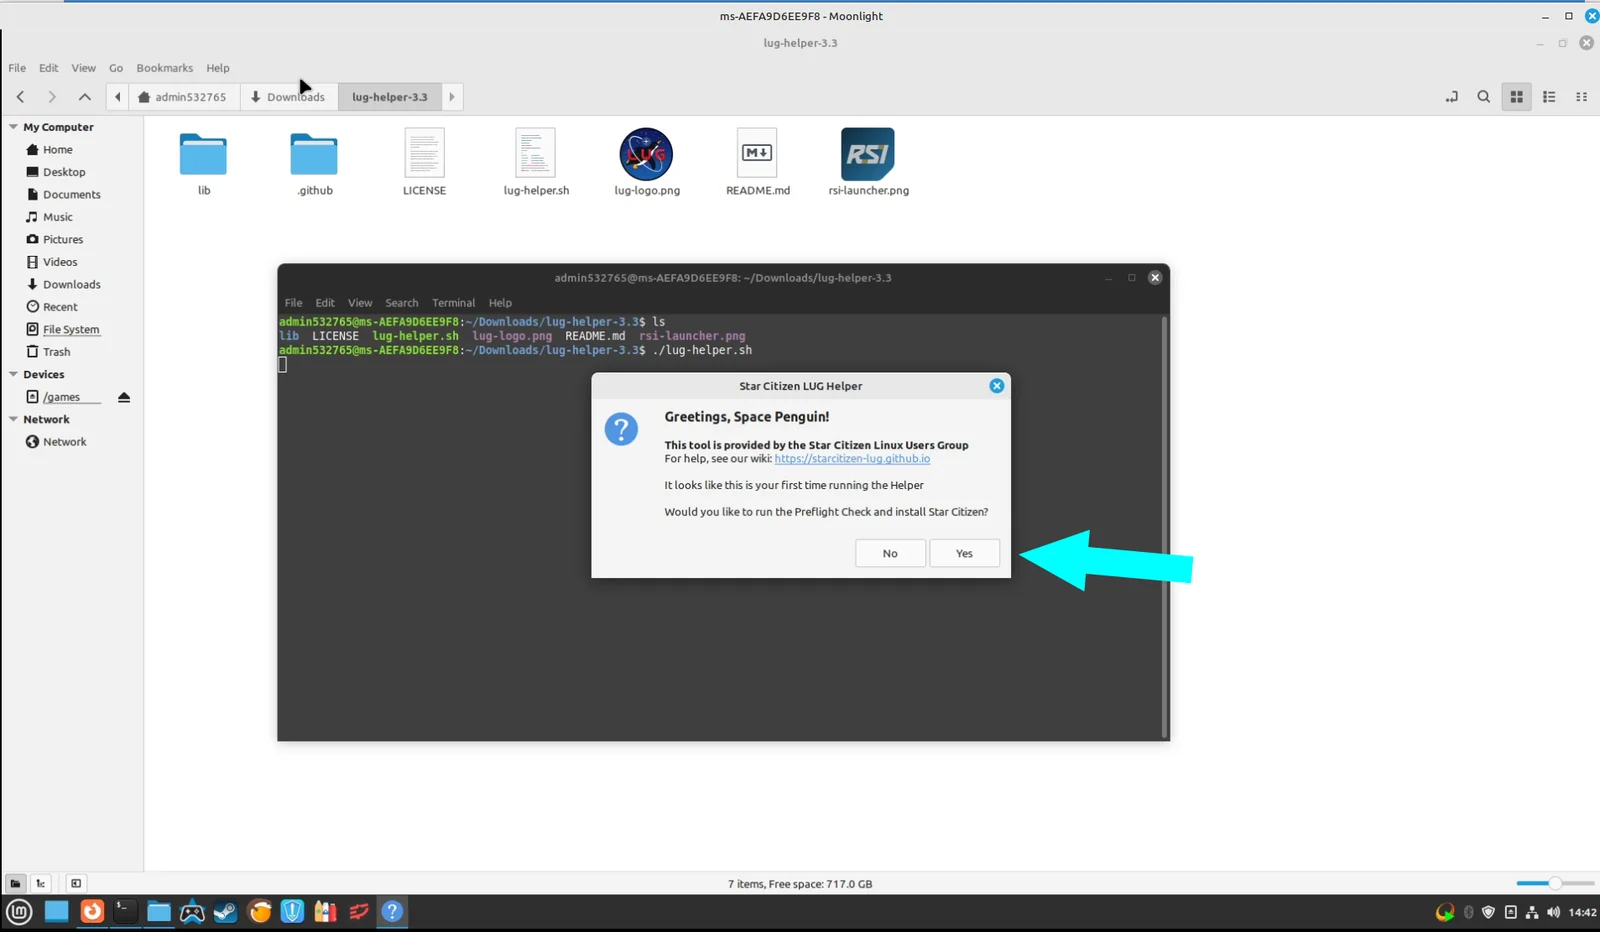
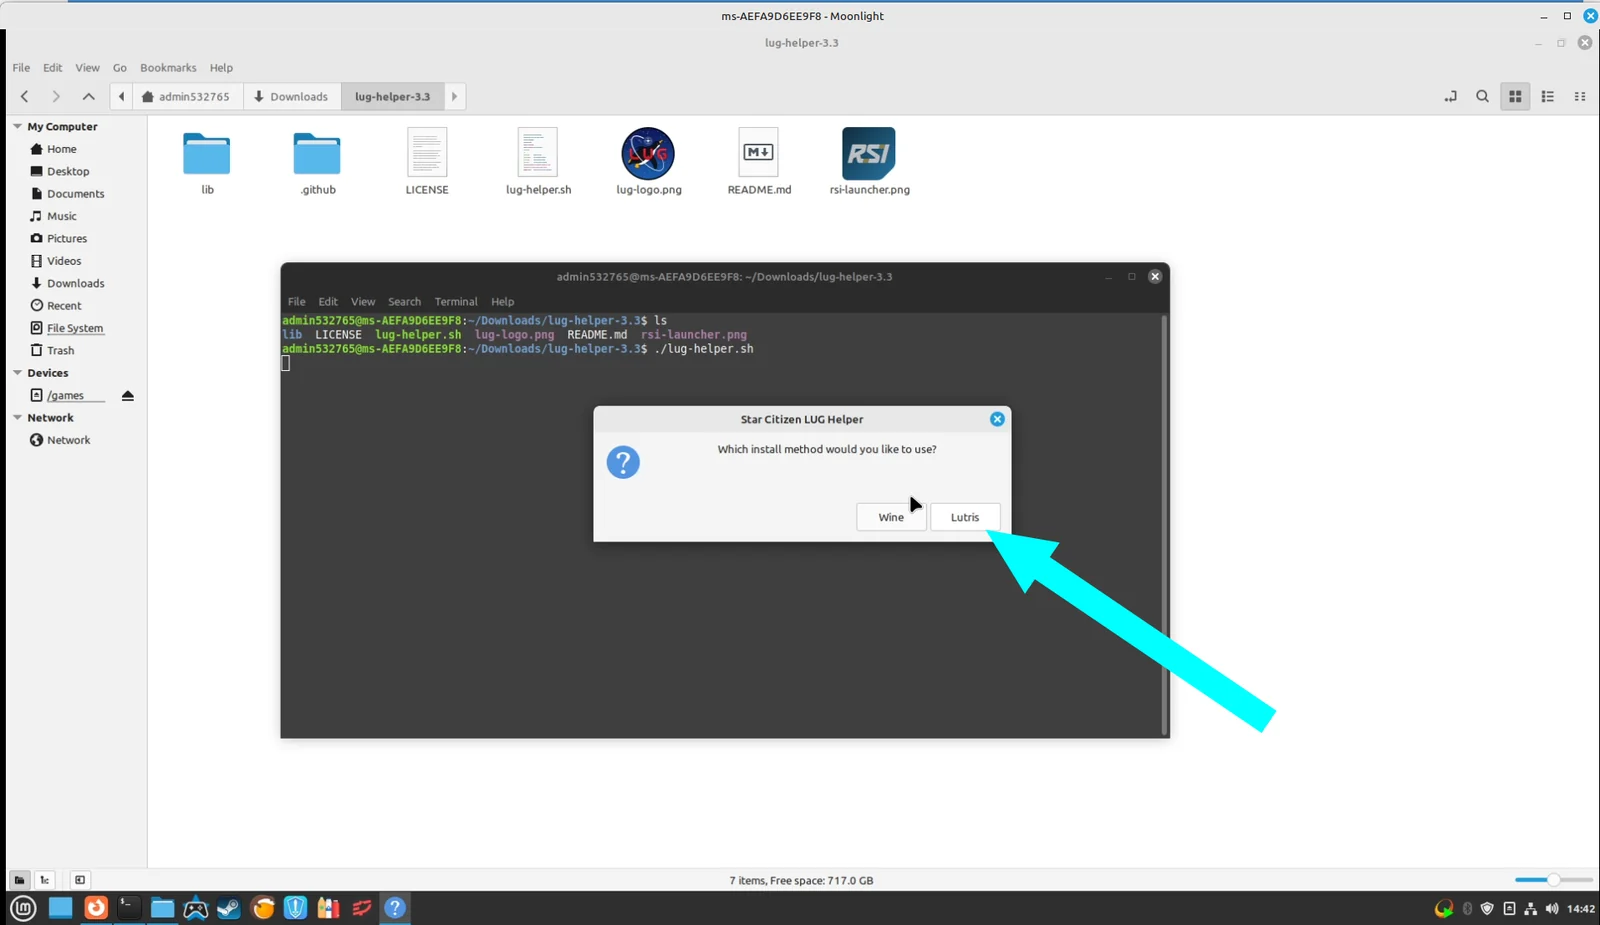
Step 10 — Choose Lutris. Select the Lutris option since it offers the best compatibility.
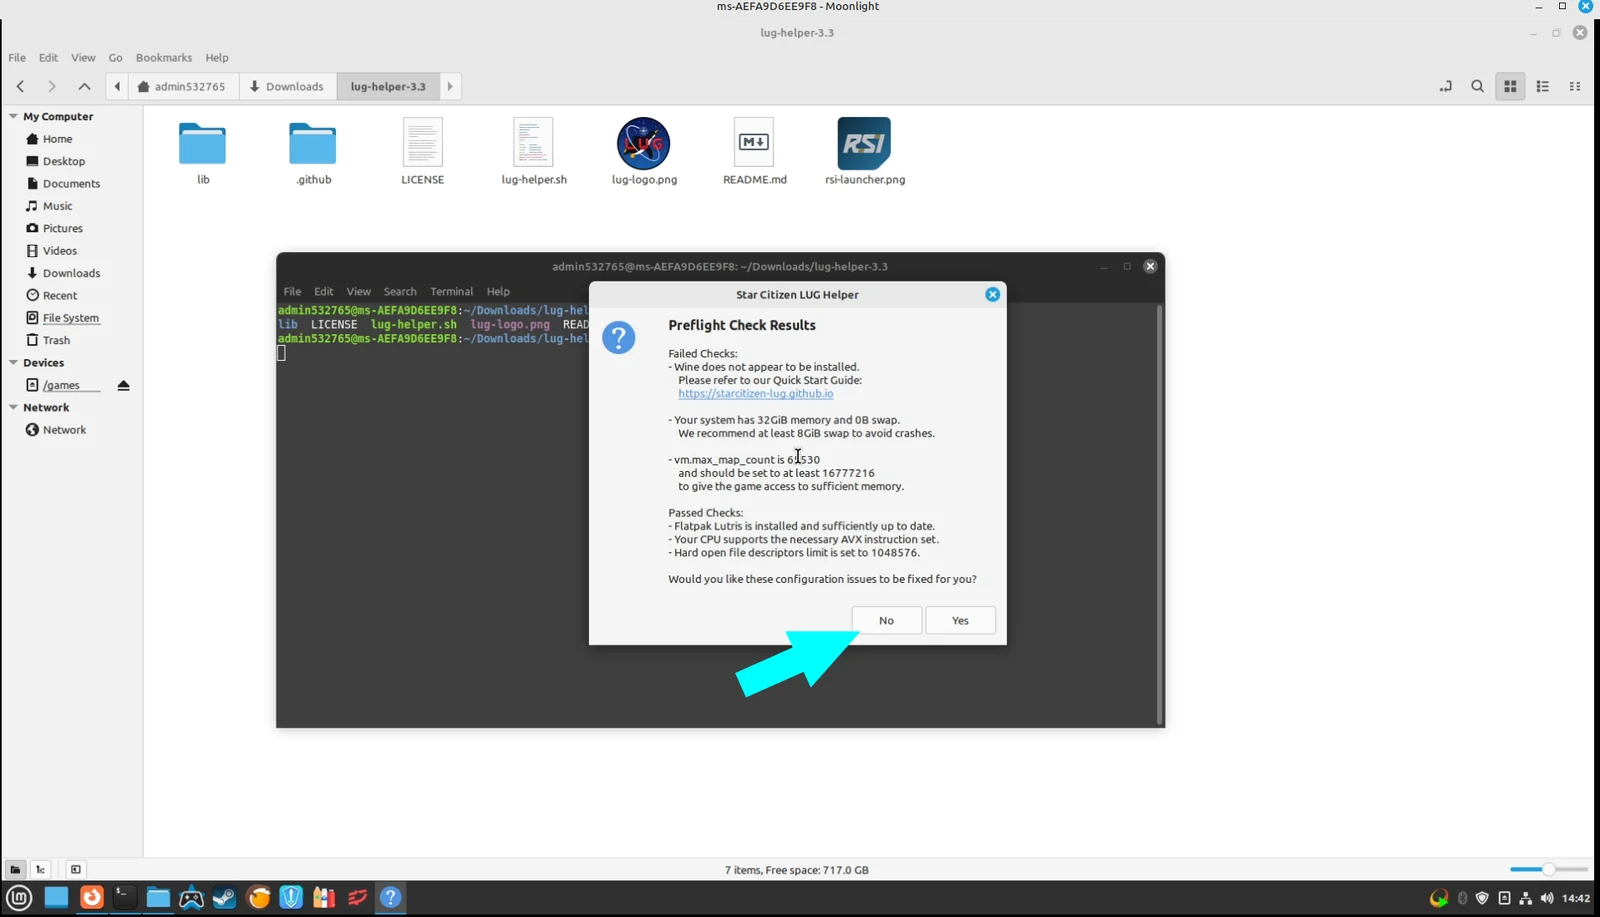
Step 11 — Decline swap. It is extremely important that you click No here. Swap can cause random crashes with our current setup — don't worry, our bare metal system has enough RAM and VRAM to run the game without any swap.
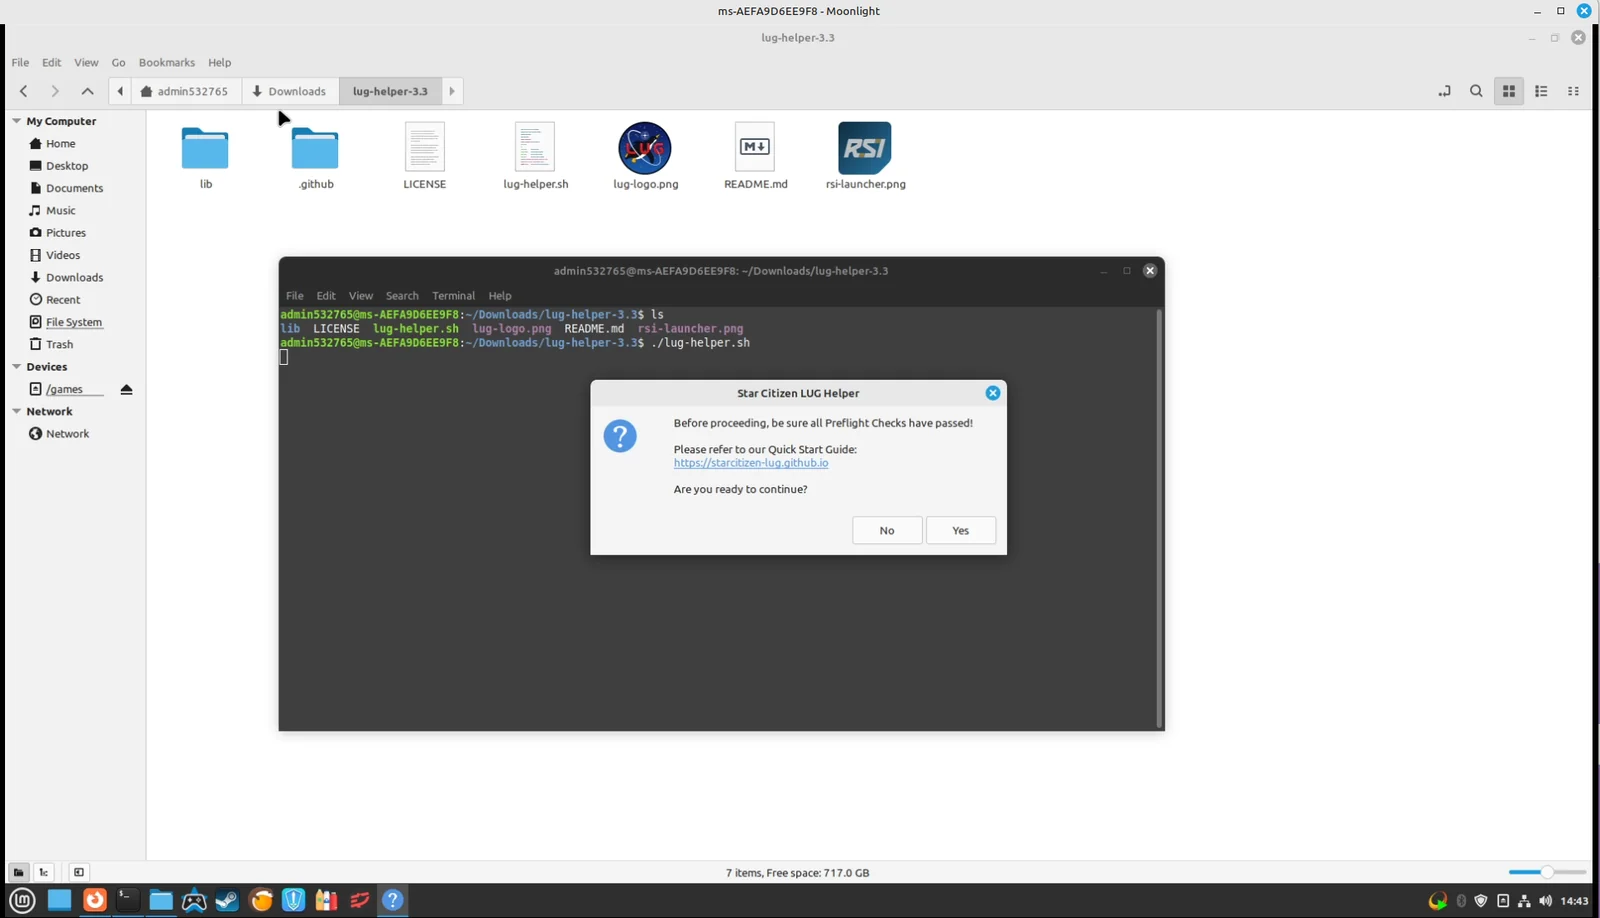
Step 12 — Confirm. Click "Yes" in the next window.
Step 13 — Lutris installer. Another window opens — the Lutris installer. Click "Install".
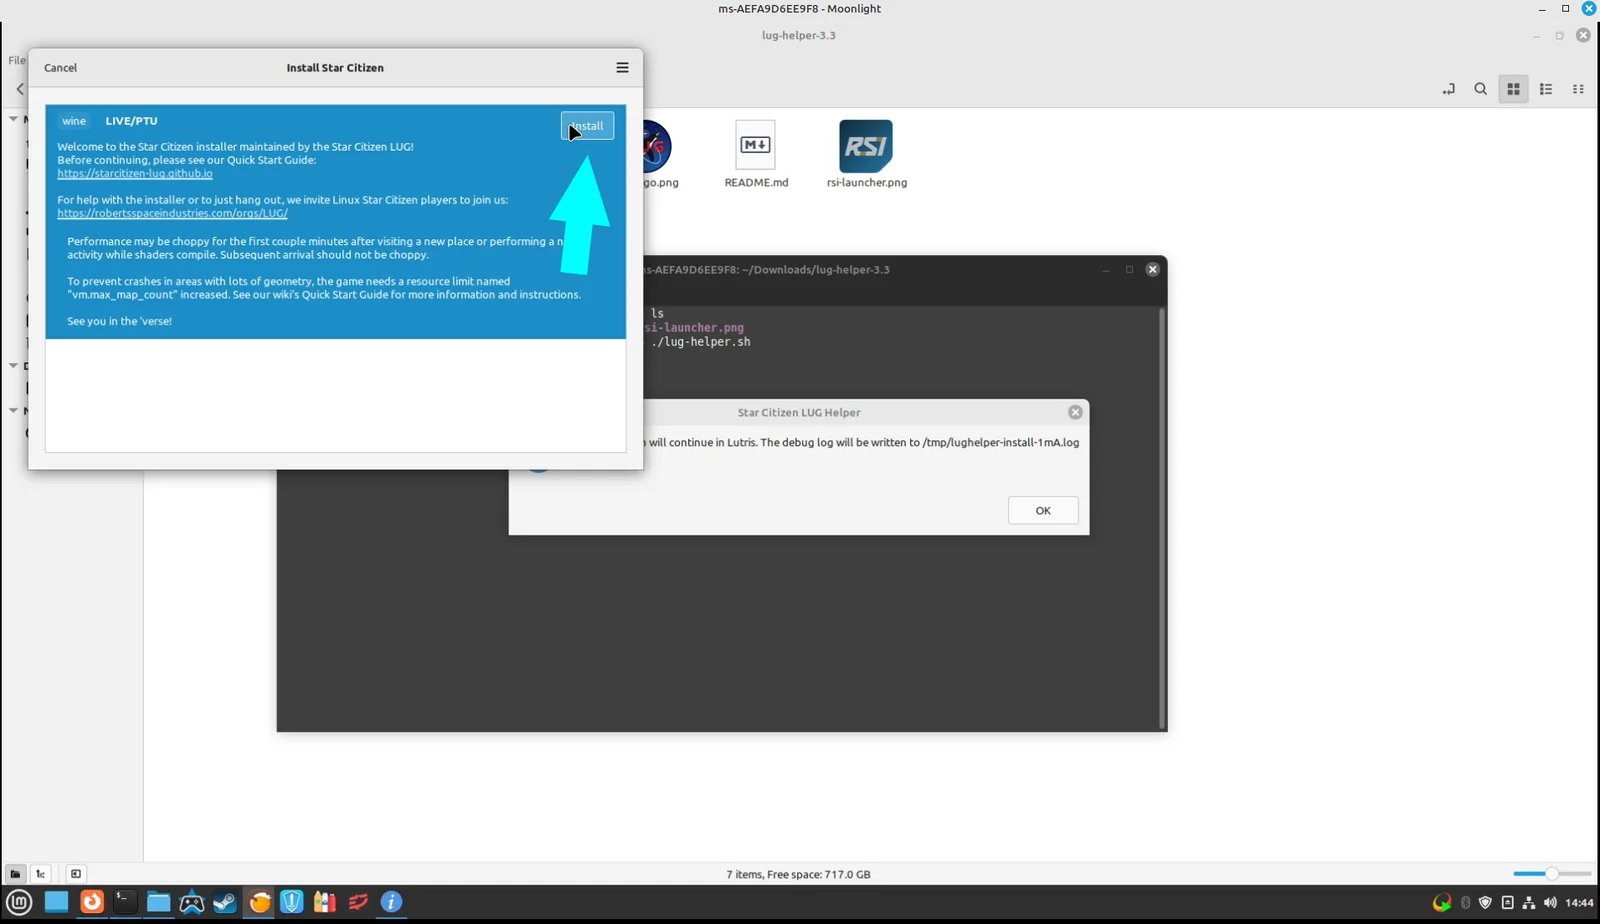
Step 14 — Continue. Please continue through the installer.
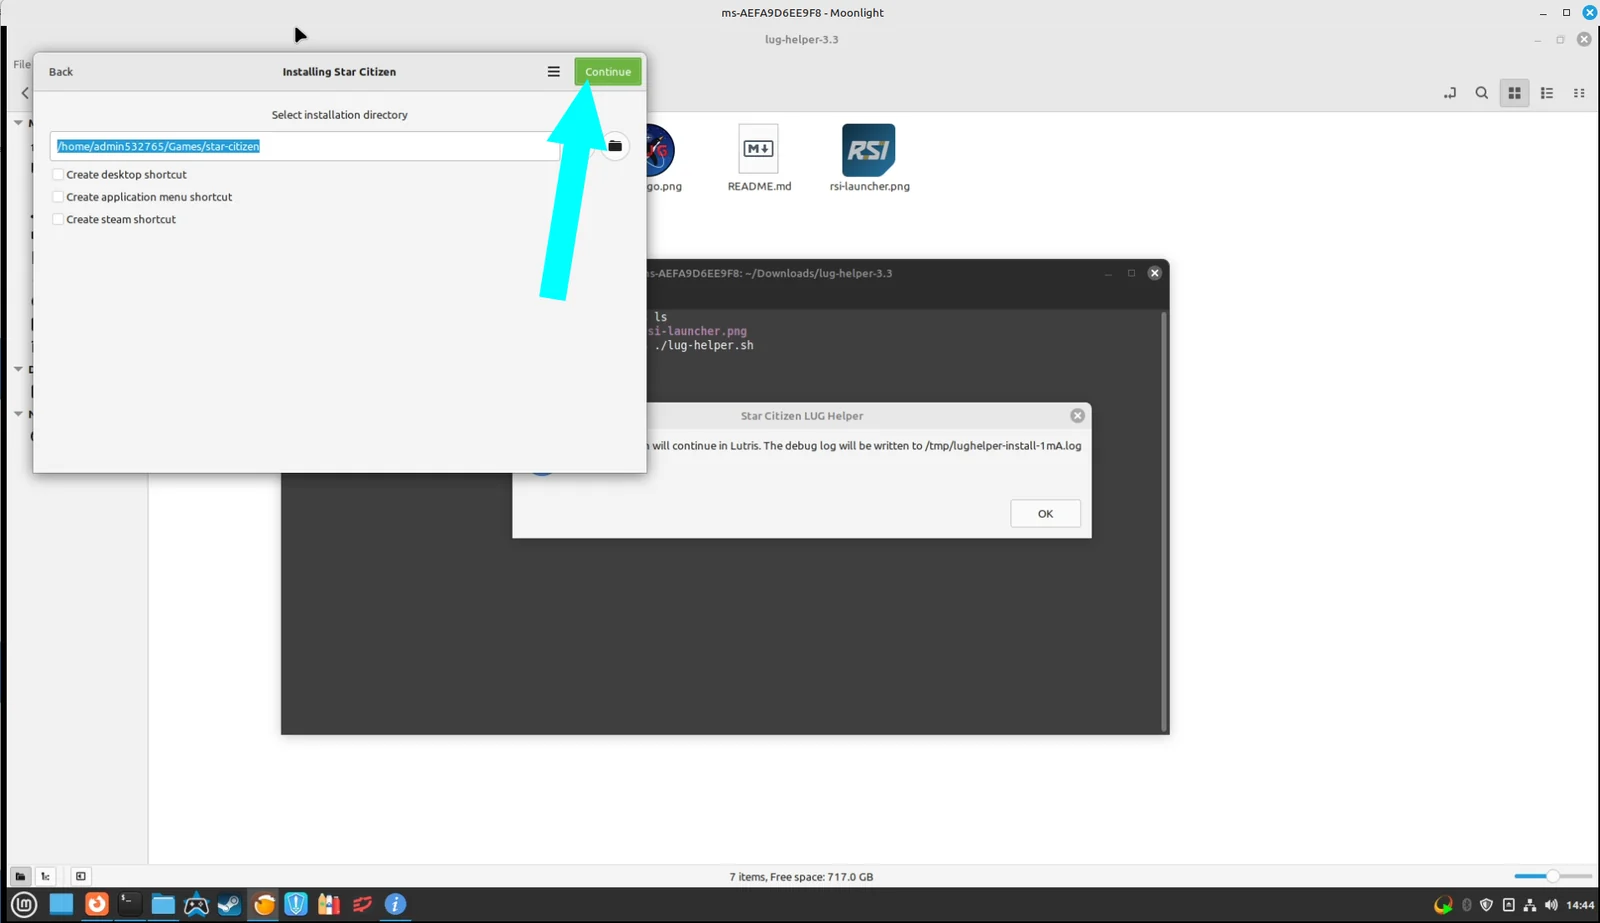
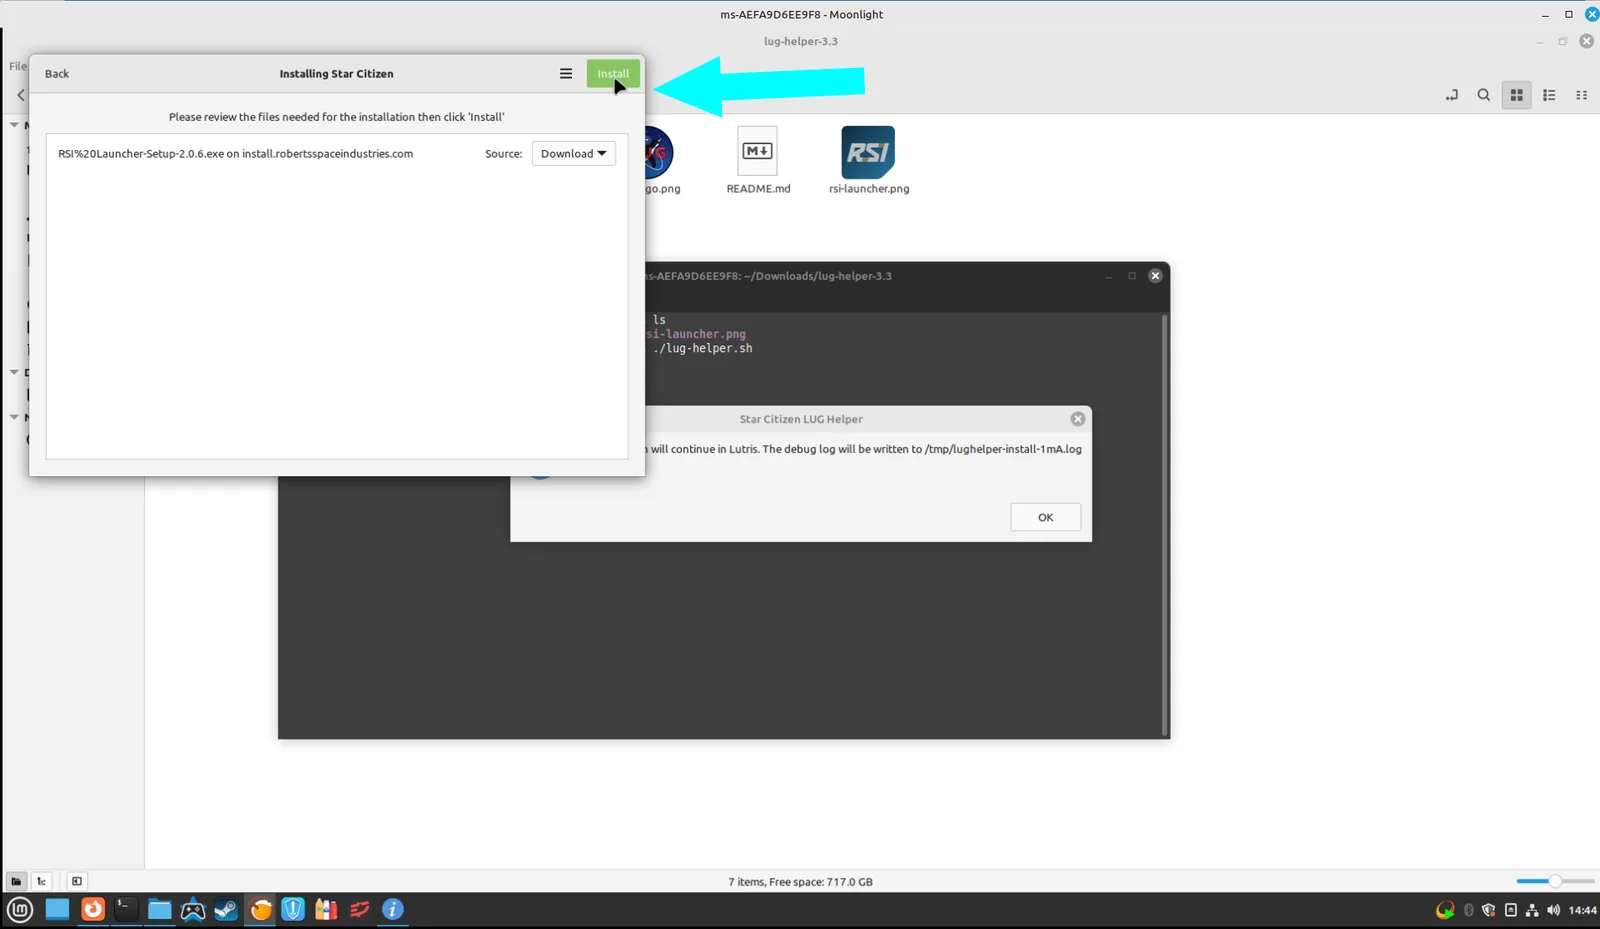
Step 15 — Download the launcher. Click "Install" to download the launcher. This may take a few minutes.
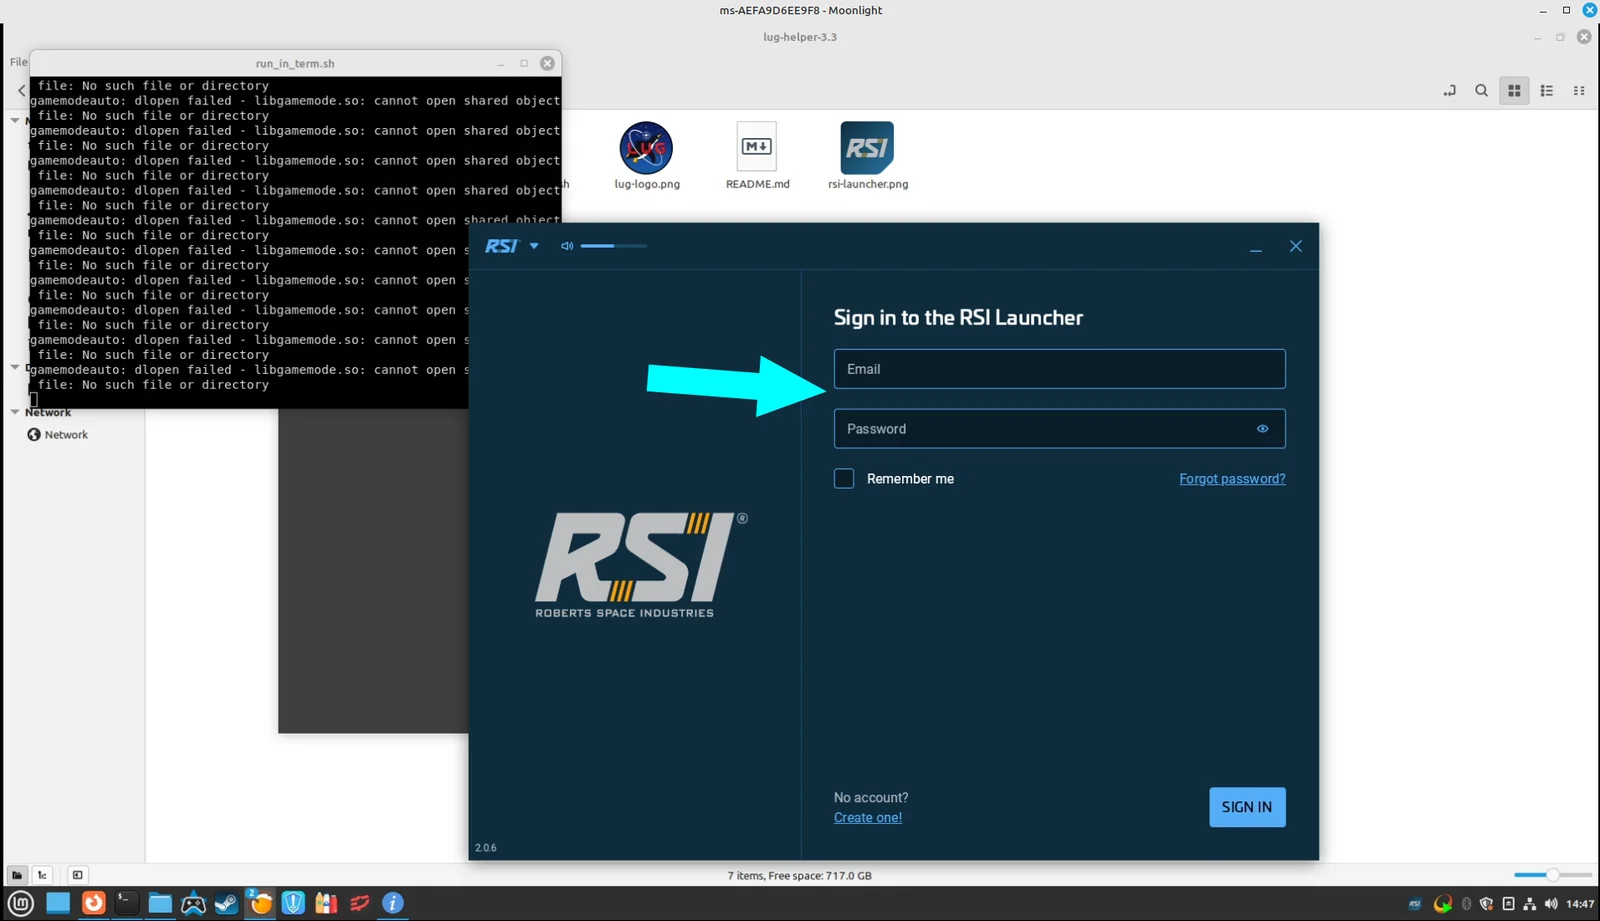
Step 16 — Launch. Click "Launch" to bring up the Star Citizen custom launcher. This can take a few seconds, so don't quit too early.
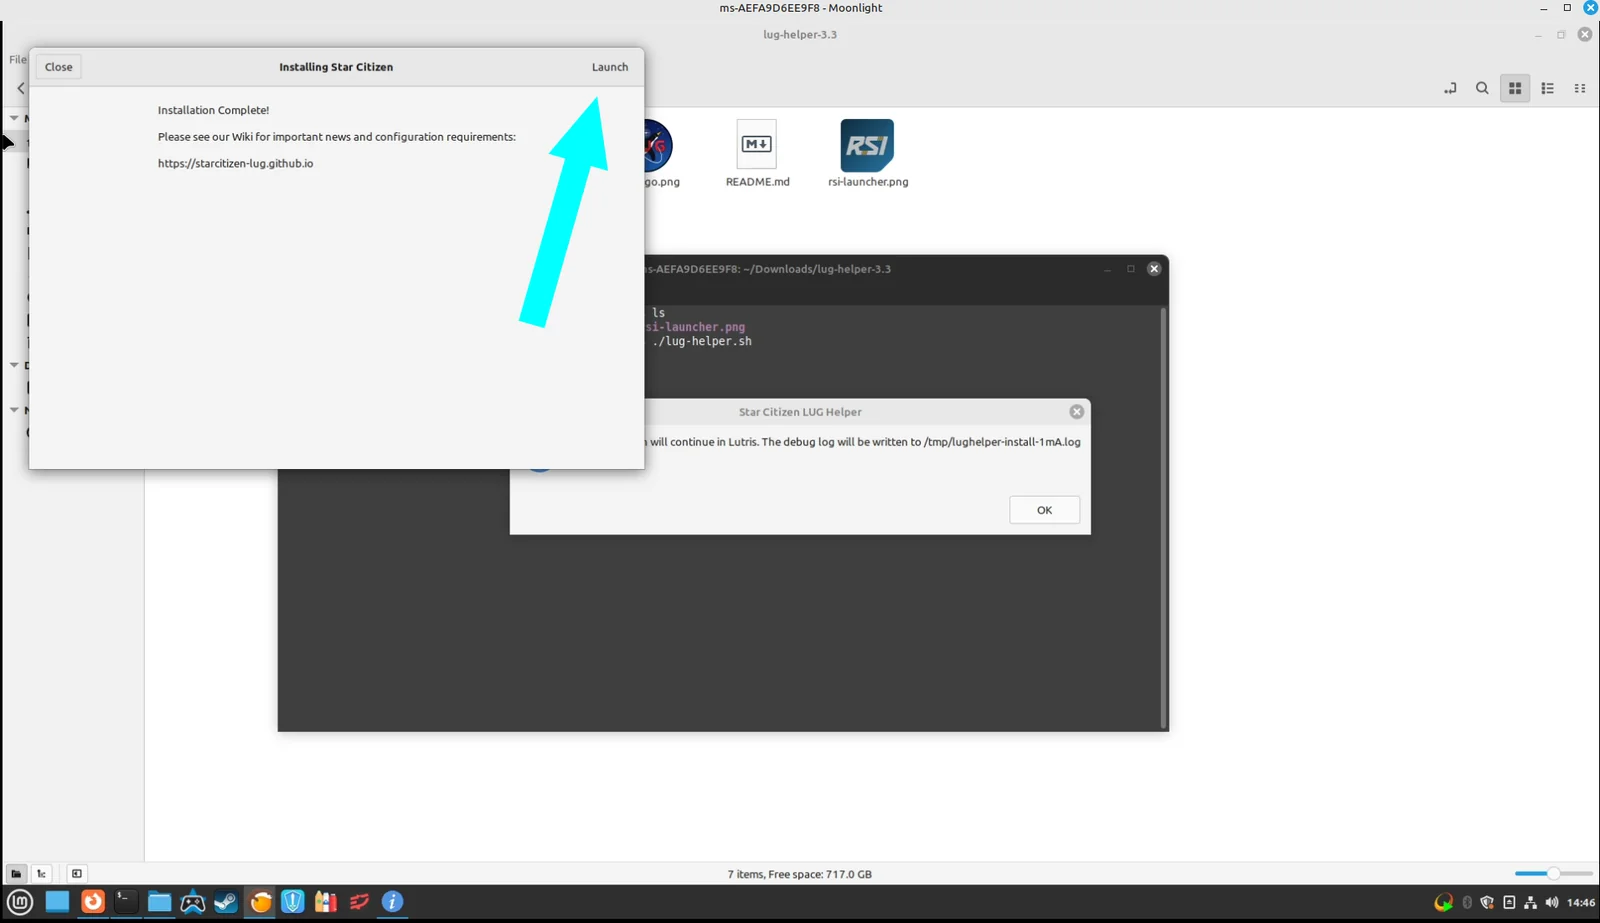
Step 17 — Done. As mentioned above, this needs to be done in Gaming Mode — the Star Citizen custom launcher requires a GPU and will not launch in Console mode. That's it, you're all done.
Play Star Citizen on bare metal
RX 7900 XTX · Ryzen 9 7800X3D · ready in 2–5 minutes
Get the Bare Metal plan